I've been making these edible little cuties for Christmas since my first Christmas as a Navy Wife. They are always a hit, and I've found that making these with children is even more fun!
First, it helps to have a caramel-unwrapper at your disposal. Most 5 year-olds are up to the task. Just be sure to lecture them on the importance of keeping their hands away from mouths, noses, the family pet, etc. while they're doing their important work. ...and it is important work. If the five-year-old won't do it, you may be left to do it yourself and well...it can be a daunting task for just one. I recommend you start with one bag of caramels. Choose a brand of caramels that you think is yummy. I use Kraft brand.

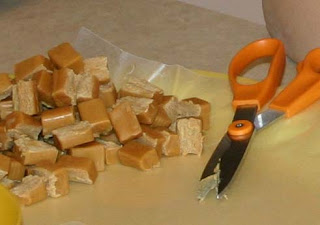
After they've all been unwrapped, cut each one in half. I used to use a whole caramel for these, but by using only half the caramel, it ups the chocolate-to-caramel ratio of the final product. I like that. Feel free to experiment.


If you'd like to keep your children busy for a long time, have them knock the sharp edges off of the caramels by picking each one up individually and banging it on the table, rotating, and banging some more. If you're in more of a rush, try placing the caramels on a parchment-lined baking sheet (after cutting them in half) and heating them in a 350 degree oven for just a couple of minutes before shaping them. The heat will make the caramels much more pliable. Place the shaped-caramels on wax paper until they're needed.
Melt some chocolate over a double-boiler. Use an amount appropriate to the size of your double-boiler--you can always add more later. You'll need enough so that the melted chocolate is about an inch deep (or more) in the pan. I use the old standby, Nestle's Semi-sweet Chocolate Morsels, but any chocolate will do. When it's melted, transfer some of it to a disposable piping bag. If you don't own any disposable piping bags, you could just use a spoon to drop a glob of chocolate onto the waxed paper. I did it this way for about sixteen years before discovering the magic that is the disposable piping bag.
Caution: melted chocolate is hot. You probably can't tell from the photo, but I am grimacing because my hands are being burned by the chocolate. If I were really smart (and I did do this, eventually) I would've donned some gloves before picking up that piping bag. Learn from me! Grab some of those cheapy stretch gloves and save your skin.
Create rows and columns of chocolate globs. You'll be pressing five peanut halves into each glob, so leave enough space between each chocolate glob to accommodate those.
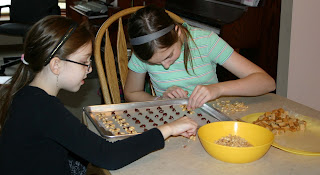
This is another step where having cheerful, willing helpers is a great boon. Not only do the peanuts (I use dry roasted peanuts, the lightly salted variety) have to be separated into halves, but they have to be arranged in a star-shape. It's labor-intensive! Gather as many helpers as you can. Make them tie up their hair, if necessary.
After all the little turtle bases have been assembled, let the chocolate harden for several hours before moving to the next step. Find the coolest spot in the house, and set them there.


No comments:
Post a Comment