In an effort to dine in more often, the family decided to forgo our 12-year tradition of eating Easter brunch at a local bakery/restaurant and instead to make our favorite menu items ourselves. I took a family poll and learned that the husband loves apple muffins. How was it that I did not know this?
I searched the web for a strudely apple muffin recipe. The internet did not disappoint! I changed the recipe just a bit, and baked what very well might be the best apple muffin I've ever eaten. Thank you, Internet!
Here's the recipe as I made it (makes 2-1/2 dozen medium-sized muffins):
4 cups all-purpose flour
2 teaspoons baking powder
1 teaspoon baking soda
1 teaspoon salt
1 cup butter, softened
2 cups white sugar
4 eggs
2-1/2 teaspoons vanilla extract
3 cups chopped apples*
The Topping
2/3 cup brown sugar
3 tablespoons all-purpose flour
1 tablespoon ground cinnamon
1/2 teaspoon ground nutmeg
3 tablespoons butter, softened
1 cup coarsely chopped walnuts
*I used 2 large Granny Smith apples. I cut each apple in half and coarsely chopped 3 of the halves; I grated the remaining half. This yielded about 4 cups of appley goodness.
Directions:
Preheat the oven to 375degrees F. Line a muffin tin with parchment squares. For these (smallish) muffin tins, I use a square that is about 3"x3". Roughly. I always use regular old Reynold's Parchment paper on a roll; not the pre-formed, colorful cupcake liners. I learned this trick from The Muffin Lady. The muffins peel away so beautifully from the parchment that it makes the extra work of cutting the squares worth the few seconds it takes.
Cream the butter and sugar until the mixture becomes light and fluffy. While that's happening, whisk together the flour, baking powder, baking soda, and salt in a separate bowl. After the sugar/butter mixture has been beaten to a light color and airy consistency add the vanilla and the eggs. Now add the flour mixture in 3 or 4 stages, scraping the sides of the bowl after each addition.
 It should look something like this.
Now add the apples. The dough will be quite heavy at this point, so you may want to switch to a dough-hook, or fold in the apples by hand.

Next, the topping:
I was excited to use an actual nutmeg nut for this recipe. MrB bought me a little bag of them at Christmastime, since Alton Brown (FoodNetwork icon) proclaims their goodness on his show quite often. Here's a picture of one of the cute little nuts, and the uh...grindings. It smelled so good! I can't wait to use it again.


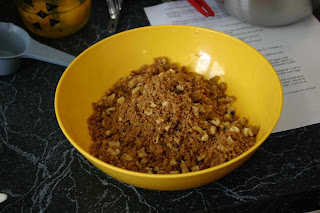
Place the brown sugar, flour, cinnamon and nutmeg together in bowl and stir to combine. Cut in the butter until the mixture forms coarse crumbs. Stir in the walnuts. Try to save some for the muffins.
Now it's time to fill the muffin cups. Once that's done, sprinkle a tablespoon or so of the topping onto each muffin. Dig those parchment liners?

Pop them in the oven at 375 degrees F for about 20 minutes. Check them with a toothpick to ensure doneness. Cool the pan of muffins on a rack for about 5 minutes, then remove the muffins and let them cool on a wire rack. I'm told this prevents soggy bottoms.

My family--even the most-picky of them--raved about these muffins.